Our Blueberry Muffin Recipe – Makes Up to 36
May 12, 2025
Our Own Fruit Muffin Recipe
UPDATE! For variety, try this with summer peaches and add a tablespoon of nutmeg and a tablespoon of cinnamon!
These are great for special occasions or just to have on hand for morning breakfast and coffee. They keep well in the freezer and re-heat in just seconds. The recipe is forgiving if you have just a tad more or less of the large bulk ingredients, but you may produce fewer or more than the 36 “standard” muffins that we usually make.
Our starting point was this recipe: Blueberry Oatmeal Flax Muffins — Dr. Karen Wallace, ND | Dartmouth, Nova Scotia (drkarenwallace.com)
Then we made our own improvements as we experimented. Finally, we doubled the recipe to make up to 36 muffins at a time. After eating a couple of these delicious muffins right out of the oven, we then placed the rest on parchment paper, freeze and then store in a resealable freezer bag.
To reheat, we just place on a microwave-safe plate with a damp paper towel on top and select “HIGH” for thirty seconds. Perfect! (Click the “paid ad” ingredient links below to see EXACTLY what brands we buy.)
What’s next? experimenting with other fruits and flavored extracts for the batter. If you like these muffins as much as our family does, please bookmark this page and share it! (Also, check out our recipe for Cornbread Muffins.)
#1: Assemble these utensils.
Utensils:
- 4 quart/16 Cup (or larger) mixing Bowl (For Dry Ingredients)
- 4 Cup (or larger) Measuring Cup (For Wet Ingredients)
- 2 Cup Measuring Cup (For Water or Buttermilk – your choice!)
- ¼ Cup Measuring Cup (Optional: 4 Tbsp = ¼ Cup)
- 1 Tbsp. (tablespoon) Measuring Spoon
- ½ tsp. (teaspoon) Measuring Spoon
- 1 tsp. (teaspoon) Measuring Spoon (Optional: 2 x ½ tsp = 1 tsp)
- 1 Large Mixing Spoon (For Final Mixture and Measuring batter into muffin cups)
- Muffin Pans for up to 36 Muffins and these (Paid Ad) reusable silicon muffin cups!
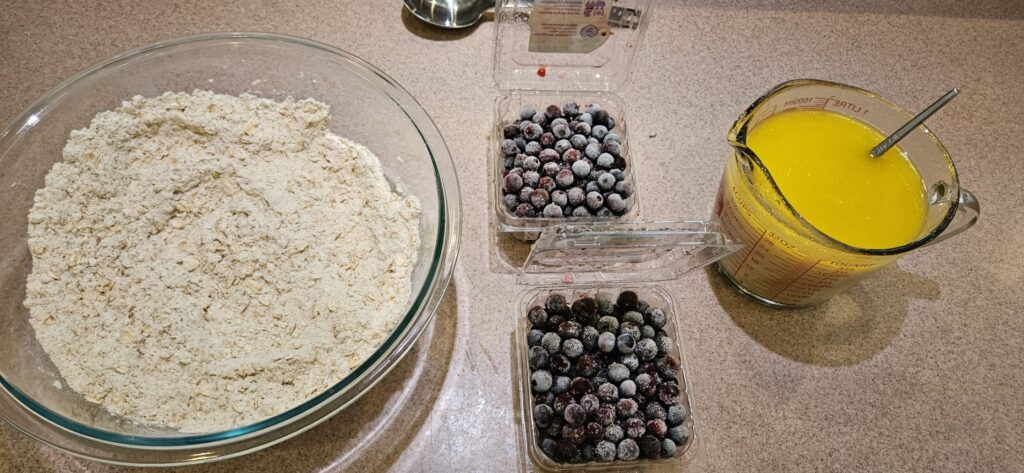
#2: Add one dry ingredient at a time in this order to the mixing bowl, and thoroughly mix with whisk each time an ingredient is added.
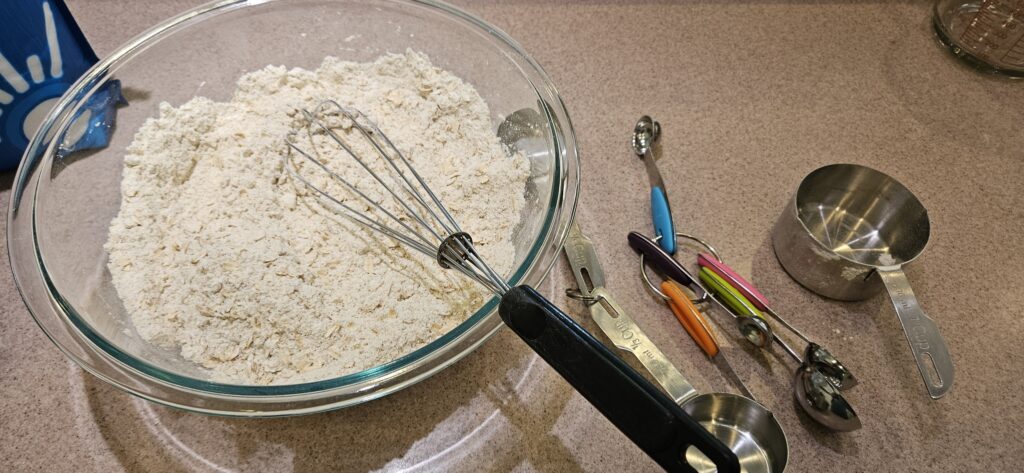
Dry Ingredients:
- 1 tsp. salt (can be omitted)
- 2 tsp. baking soda
- 2 tsp. baking powder
- 1/4 cup (4 Tbsp.) buttermilk powder (Paid Ad)
- 1 cup Xylitol Sweetener (Paid Ad)
- 1 cup ground flax seed meal (Paid Ad)
- 2 cups gluten free flour (Paid Ad)
- 2 cups rolled oats (Paid Ad)
(Approximately 6 ¼ Cups Dry Ingredients)
Fruit Ingredient:
- 2 pints of whole blueberries, diced peaches, cherries, cranberries, apples, or other fruit (Preferably frozen – sized like whole blueberries)
(Approximately 4 Cups Fruit)
#3: Melt Butter in microwave. Do not Overheat.
#4: Add and mix one wet Ingredient at a time in order to the 4-cup measuring cup in this order.
#5: Confirm mixture temperature has cooled before adding eggs.
Wet Ingredients:
- 2/3 cup melted butter (11 Tbsp.)
- 1 3/4 cup cold water
- 1 cup unsweetened refrigerated applesauce (Paid Ad)
- 2 eggs
- 2 Tbsp. Lemon Extract (Paid Ad)
(Use Lemon Extract with blueberries. Other extracts to compliment other fruit fillings)
(Approximately 4 Cups Liquid Ingredients)
#6: Combine and thoroughly mix the wet and dry ingredients.
*** You Can Use an electric mixer to get a thoroughly mixed muffin batter! ***

#7: Fold the fruit into the mixed wet and dry ingredients with a large mixing spoon.
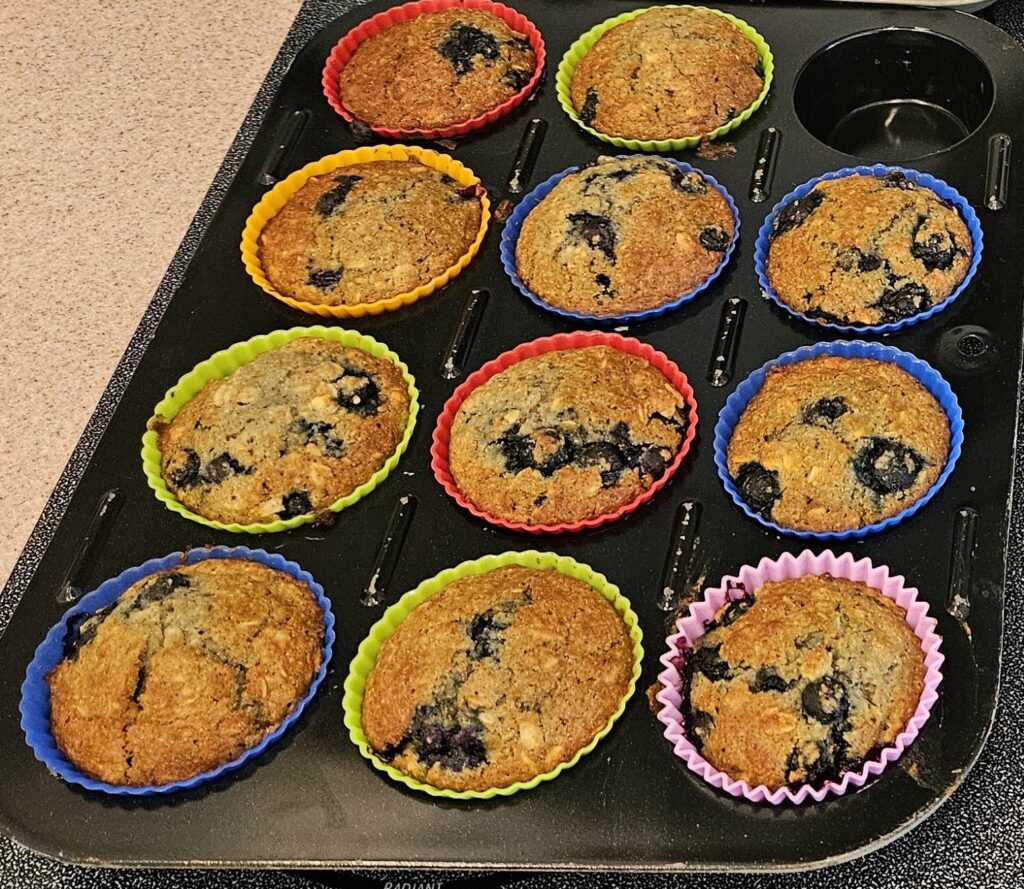
#8: Scoop into reusable muffin pans lined with the reusable silicon baking cups (above). Makes 24-36 muffins, depending on your “generosity” with the batter to each muffin cup.
#9: Bake at 350 degrees convection (375 Conventional) for 20 minutes.
#10: Remove One Muffin and Enjoy!
See our latest posts!
November 1, 2024


It’s Time For Cornbread Muffins!
July 15, 2024
If you enjoyed our recipe for Blueberry Muffins, you should try these cornbread muffins. These cornbread muffins are an excellent accompaniment to a hearty meal like roast beef & potatoes, or soup. (Be sure to save this recipe for cooler weather!)
We took a starter recipe for the blueberry muffins and these cornbread muffins and made a couple of changes to each. First, we substitute “1 for 1” our preferred “no sugar sweetener” (Xylitol) in place of brown sugar. We also substitute a powered milk & water instead of fresh milk. Then we make a similar substitute with gluten-free flour. (Click the “Paid Link” above, or this one, to find the original recipe on the back of “Brinser’s Best Yellow Corn Meal“).
Finally, we increase the recipe to make up to 36 muffins at a time. After eating a couple of these delicious muffins right out of the oven, we then placed the rest on parchment paper, freeze and then store in a resealable freezer bag.
To reheat, we just place on a microwave-safe plate with a damp paper towel on top and select “HIGH” for thirty seconds. Perfect! (Click the “paid ad” ingredient links below to see EXACTLY what brands we buy.)
Our Own Cornbread Muffin Recipe
#1: Assemble these utensils.
Utensils:
- 4 quart/16 Cup (or larger) mixing Bowl (For Dry Ingredients)
- 6 Cup (or larger) mixing bowl (For Wet Ingredients)
- 4 Cup Measuring Cup (For Water)
- 2 Cup Measuring Cup (For Butter)
- 1/2 and 1 Cup Measuring Cups (For Dry Ingredients & Milk Powder Optional: 8 Tbsp = 1/2 Cup)
- 1 Tbsp. (tablespoon) Measuring Spoon
- 1 Large Mixing Spoon (For Final Mixture and Measuring batter into muffin cups)
- Muffin Pans for up to 36 Muffins and these (Paid Ad) reusable silicon muffin cups!
#2: Add one dry ingredient at a time in this order to the mixing bowl, and thoroughly mix with whisk each time an ingredient is added.
Dry Ingredients:
- 1 Tbsp. baking powder
- 1 Tbsp. baking soda
- 1/2 cup (8 Tbsp.) milk powder (Paid Ad)
- 2 cups Xylitol Sweetener (Paid Ad)
- 3 cups gluten free flour (Paid Ad)
- 2 cups Corn Meal (Paid Ad)
- 1 cup Flaxseed Meal (Paid Ad) ** This gives the muffin a slightly nutty taste! **
(Approximately 8 1/2 Cups Dry Ingredients)
#3: Melt Butter in microwave. Do not Overheat.
#4: Add and mix one wet Ingredient at a time in order to the 6-cup mixing bowl in this order.
#5: Confirm mixture temperature has cooled before adding eggs.
Wet Ingredients:
- 1 cup melted butter (16 Tbsp.)
- 2 1/2 cups cold water
- 4 eggs
(Approximately 4 Cups Liquid Ingredients)
#6: Combine and thoroughly mix the wet and dry ingredients.
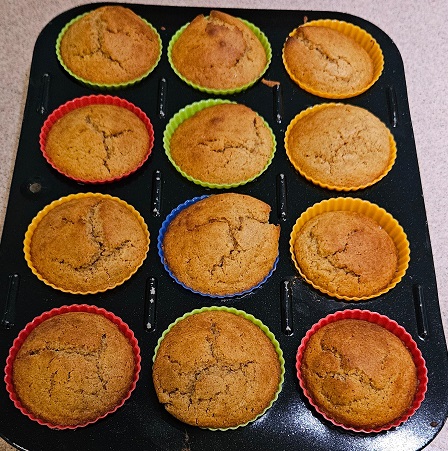
#7: Scoop into reusable muffin pans lined with the reusable silicon baking cups (above). Makes about 36 Standard size muffins.
#8: Bake at 325 degrees convection (350 Conventional) for 25 minutes.
(Approximately 13 Cups combined Ingredients)
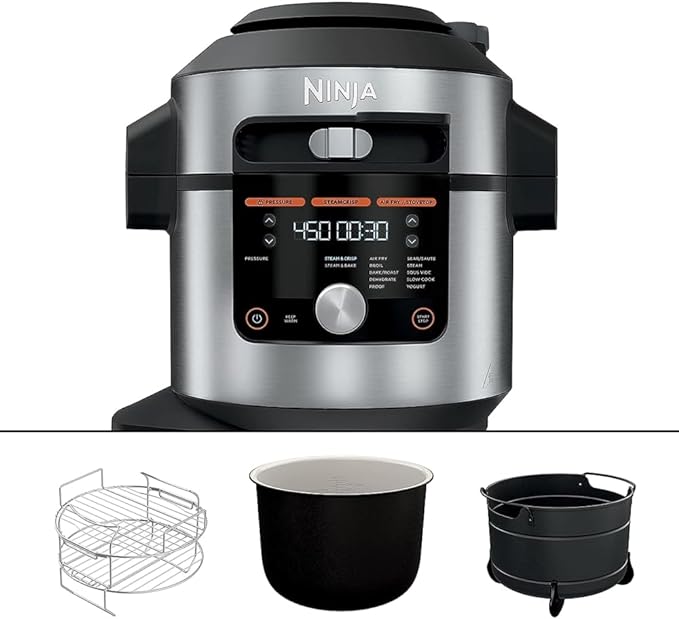
This is one of the most versatile counter-top appliances I have ever encountered. It claims a total of fourteen cooking functions in addition to: to “Air-Fry” mode, “it can function as a “pressure cooker” and a “steam crisper“.
Let’s talk chicken. We can place 6-8 of these prepped chicken tenders on the air fry rack, and the Ninja Air Fryer (on the “air fry” setting) will cook them to perfection in 6 minutes at 390 degrees. Preparing the chicken is quick and easy. We coat the tenders in olive oil, lay them flat and sprinkle just a little of Tutu’s Pantry’s Hawaiian BBQ Seasoning. Of course, if you like extra spicy you can add more – but just a light sprinkle is enough for my palate.
The removable cooking container is easy to clean, and typically is used with the inserted cooking rack or the crisping basket. After cooking, I let it cool a bit and carefully remove the cooking container, rack and basket. I add a little soap and water to soak a bit and then rinse.
Ok. About that crisping backet. Every so often, I really want a few fresh and hot fries. So, I’ll slice two or three potatoes – sometimes thin and sometimes a little thicker. I’ll let them swim in just a little olive oil and a dash of salt to coat, and then into the Ninja on “air fryer” mode at 390 degrees for about 25 – 30 minutes.
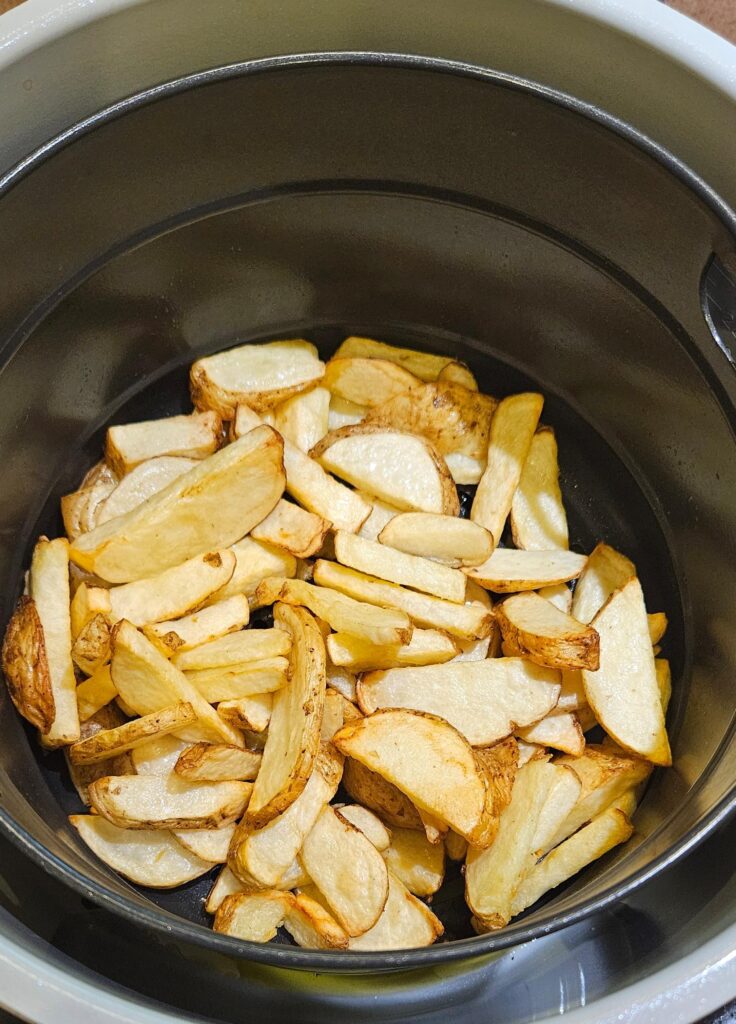
The Ninja will beep about halfway through the timer setting to remind you to shake the crisper backet, but the basket is quite hot. So, I have a cooking spoon that I use to reach in and toss the fries three or four times until they are done.
The pressure cooker mode is activated by locking the lid, adjusting the pressure relief valve to the proper position and setting the timer. Steam crisp settings are for air frying other vegetables that you would prefer crisp, yet still moist.
Anova Sous Vide Makes Perfect Roast
July 7, 2024
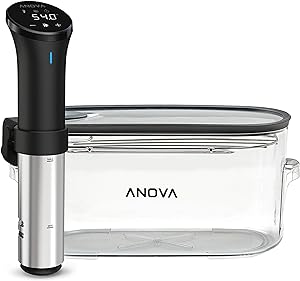
We bought this complete Anova Sous Vide Immersion Circulator Kit, and it changed the way we think about food preparation. (Be sure to check out the demonstration video when you click the link.)
Whether it is steak, chicken or fish, cooking is a delicate tradeoff between time and temperature. While it may be true that doubling the temperature cuts the time, the results are not always that great! Why not try something different?
Sous Vide is low temperature cooking – compared to baking, grilling or stove-top cooking. That means it takes a bit more time than other methods, but the results are worth it. Low and slow means no “watched pots” or pans that might boil over or burn a steak when you are not watching. Sous Vide just quietly works and only needs attention when prepped and then when you are ready to eat.
We just prepared two two-pound roasts in our Sous Vide. At 140-145 degrees Fahrenheit they came out a perfect medium to medium well. Steaks, Chicken, roasts and even small turkey breasts sit in vacuum-sealed bags in a water bath until done. Done for roasts means fork tender, with all the flavorful juices and seasonings contained in the cooking bag. (See how to bag and seal here.)
Need to wait 30 minutes while the side dishes finish? Sous Vide cooking is very forgiving – and steaks can remain at a perfect temperature for serving until everyone is ready to eat.
Check back, and I will post our recipe for seasoning a sous vide roast. All the ingredients go in with the roast and flavors the meat during the entire cooking time.
From the cooking bag, I captured about a quart of Au Jus from this completely cooked roast. It did not need to be prepared separately, and the flavorful liquid is a wonderful combination of the natural beef flavors, and the Barbeque sauce added at the start of cooking. This flavorful liquid can be served on each portion of roast when it is finished cooking
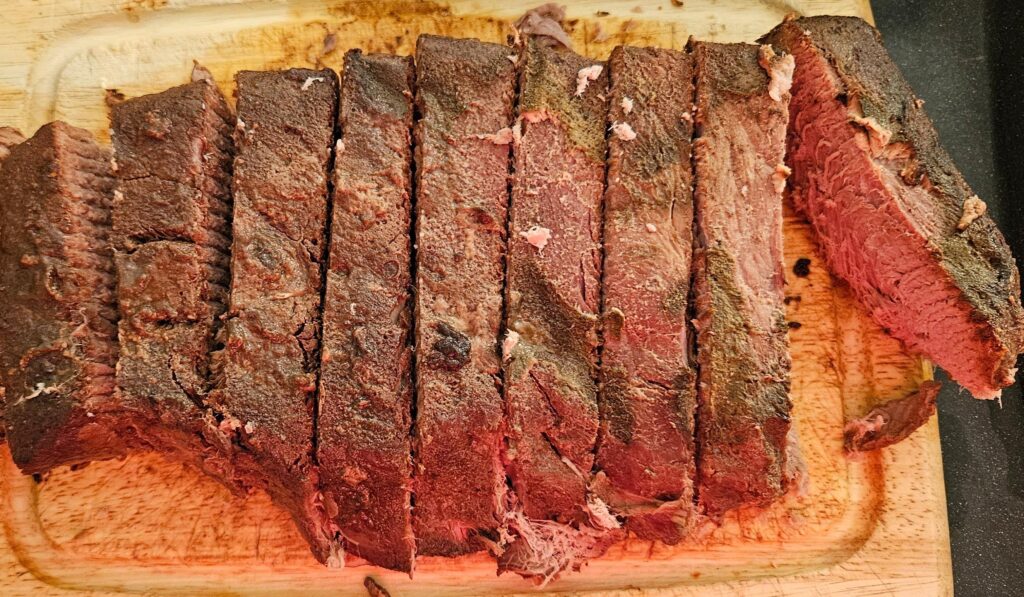
UPDATE: Here is the recipe for the homemade BBQ sauce we add to seasoning a sous vide roast. Prepare in advance, and when you are ready to cook that roast, add some of this delicious sauce into the vacuum seal bag along with the roast. You can even take the roast right out of the freezer, no need to thaw in advance. Just seal it up and place it in the sous vide at 140-145 degrees for 72 hours. (Yep. Three days. Just set and forget. Trust the process. Top off with a little water if evaporation should occur. The results are tender, not overdone and delicious!)
From the cooking bag, I captured almost a quart of Au Jus from this completely cooked roast. It did not need to be prepared separately, and the flavorful liquid is a wonderful combination of the natural beef flavors and the Barbeque sauce added at the start of cooking. This flavorful liquid can be served on each portion of roast when it is finished cooking.
If we freeze 4 to 6 ounce portions for a quick reheated meal, we add some of this liquid in each vacuum-sealed bag. Check out our vacuum sealer and supplies here.